How to Create a Trigger in Salesforce: 6 Steps
Salesforce triggers can help your database operate more effectively. However, if you don’t know how to create them, this step-by-step guide to creating triggers for your Salesforce database will help.
Since trigger codes are bound to Apex transactions, they are subject to governor limitations. You can reduce the number of times a user attempts a governor limit exception by using triggers with a specific set of conditions.
This article will cover what you need to know regarding these triggers, including the two types and how to create them.
What is a Trigger in Salesforce?
Triggers in Salesforce are known as Apex triggers and are a piece of code that allows you to execute custom actions before or after any change in a Salesforce record. That includes performing the following operations on database records:
- Insert
- Update
- Delete
- Merge
- Upsert
- Undelete
You can use triggers to carry out tasks based on certain situations. That way, only when that condition occurs the system executes the trigger.
You can also use triggers to modify records or restrict operations from occurring, such as preventing a user from adding or deleting fields. You can use triggers to do anything you once did in Apex, including executing Salesforce Object Query Language (SOQL) and Data Manipulation Language (DML) statements.
If any changes occur to these objects, you can set a trigger to perform a set of functions. You can define triggers for top-level standard objects such as accounts, contacts, custom items, and standard child items.
These triggers are active by default when created. Salesforce designed triggers to fire automatically when a specific event occurs in the database.
Types of Salesforce Triggers
There are two types of Salesforce triggers, a before trigger and an after trigger.
Before Triggers
These triggers perform a task before you insert, update, or validate a Salesforce record value. You will use a before trigger before saving them to the database or making changes. These triggers are ideal for setting default values and performing logic or calculations.
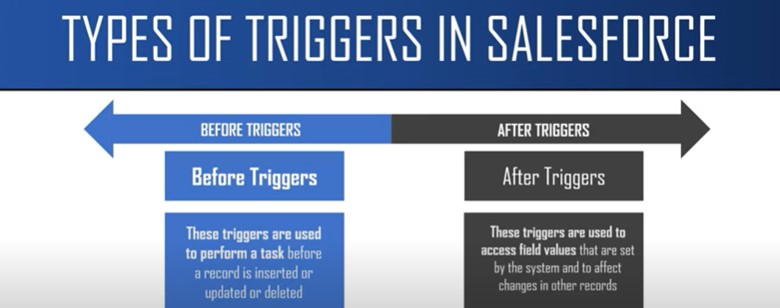
After Triggers
You will use after triggers to access field values already set by the system, such as records ID, date, or any other field of data. It will affect changes in other records. You will use an after trigger to update or validate record values after you save them to the database.
Also, after triggers are read-only. You cannot alter them in any way.
6 Steps to Creating a Trigger in Salesforce
You can get to the Developer Console from the main Salesforce platform. Click on the setting icon on the upper right side and click “Developer Console.”
From the Developer Console, you will use the following steps to create a Salesforce trigger:
1. Click on New Trigger
From the Developer Console, click on “File” on the upper left side of the tab menu. Then, click on “New,” and from that menu, you will select “Apex Trigger.”
2. Name Trigger
Now you will name the trigger. You can give it any name that you would like. However, make sure that it is associated with the object and the operation you want the trigger to affect.
3. Select Object Type
Now, select the Salesforce object you want the trigger to affect. For example, you can choose Account, Contact, or any other custom object you want. You can even set them for standard child objects.

4. Click Submit
Once you have named the trigger, you will click the box labeled “Submit.” When you click on submit, you will be able to see the trigger keyword (the name you gave the trigger), the object you selected for the trigger, and the trigger event (i.e., “before insert”).
5. Replace Existing Code
For the body of the code, you will need to replace the existing default code and replace it by creating a For Loop first. Keep in mind, when you are writing code, make sure you separate actions with commas. That is essential to ensure the code will work correctly.
Another critical element when writing trigger code is to set a condition. For example, if you are setting a trigger to send out an error message if a user attempts to create a duplicate account, you will need to set a condition code written, such as {acc.Name.addError(“Account with the same name already exists);}
6. Save the Trigger
After you complete each step of the process and set conditions, you will want to save your trigger. After you save the trigger, you should test it to guarantee it will work. You can do this by attempting the action you set the trigger for.
For example, if you set the trigger to alert users with an error message if creating a duplicate account, attempt to create an account you know already exists. If the error message pops up, you successfully created the trigger.
Rainmaker Can Help You Implement Salesforce Triggers
Creating Salesforce triggers will improve your Salesforce database. However, not everyone understands how to effectively write the code needed to create triggers.
At Rainmaker, we have the expertise to make this process an easy one. Our professional consultants can help you implement this and any other aspect of Salesforce to ease the stress of your daily business operations.
If you are looking to create triggers for your Salesforce platform but still feel uncertain of what to do, contact us here at Rainmaker and let one of our friendly consultants help you get started today.